


Cape Coral Bathroom Remodel: Plan a Bidet Outlet Before Tile
The right time to plan a bidet-seat or bidet-toilet outlet is before the bathroom walls and floors receive their finished surfaces. If you wait until tile is installed, moving the wiring can mean cutting into new finishes and coordinating another round of electrical work.
In a Cape Coral bathroom remodel, the outlet plan should match the selected device, toilet position, vanity, plumbing, and tile layout. The exact requirements depend on the product and the project, so the electrician should review the manufacturer's instructions and local permitting requirements before work begins.
Key Takeaways
- Choose the bidet seat or toilet before electrical rough-in. Cord location, length, and power needs differ by model.
- Plan the outlet while the walls are open, before tile installation makes changes harder.
- Coordinate its location with the toilet, vanity, plumbing, finished wall surfaces, and tile pattern.
- GFCI protection and circuit requirements depend on applicable electrical rules and product instructions. There is no universal outlet height, side, or circuit rule for every bidet.
- Have a licensed electrician review the device specifications and current Cape Coral permitting requirements before work starts.
Why plan a bidet outlet before tile installation?
An outlet is easy to adjust when framing and wiring are accessible. After the wall is finished, moving it may require opening tile or drywall, repairing the surface, and matching the new finish. A location that seemed convenient on paper can also become awkward once the toilet and vanity are installed.
This planning step matters for both a bidet seat and an integrated bidet toilet. Each may have a different cord exit, and the device needs a nearby receptacle that remains accessible without interfering with normal bathroom use.
Make the decision while the wall is accessible
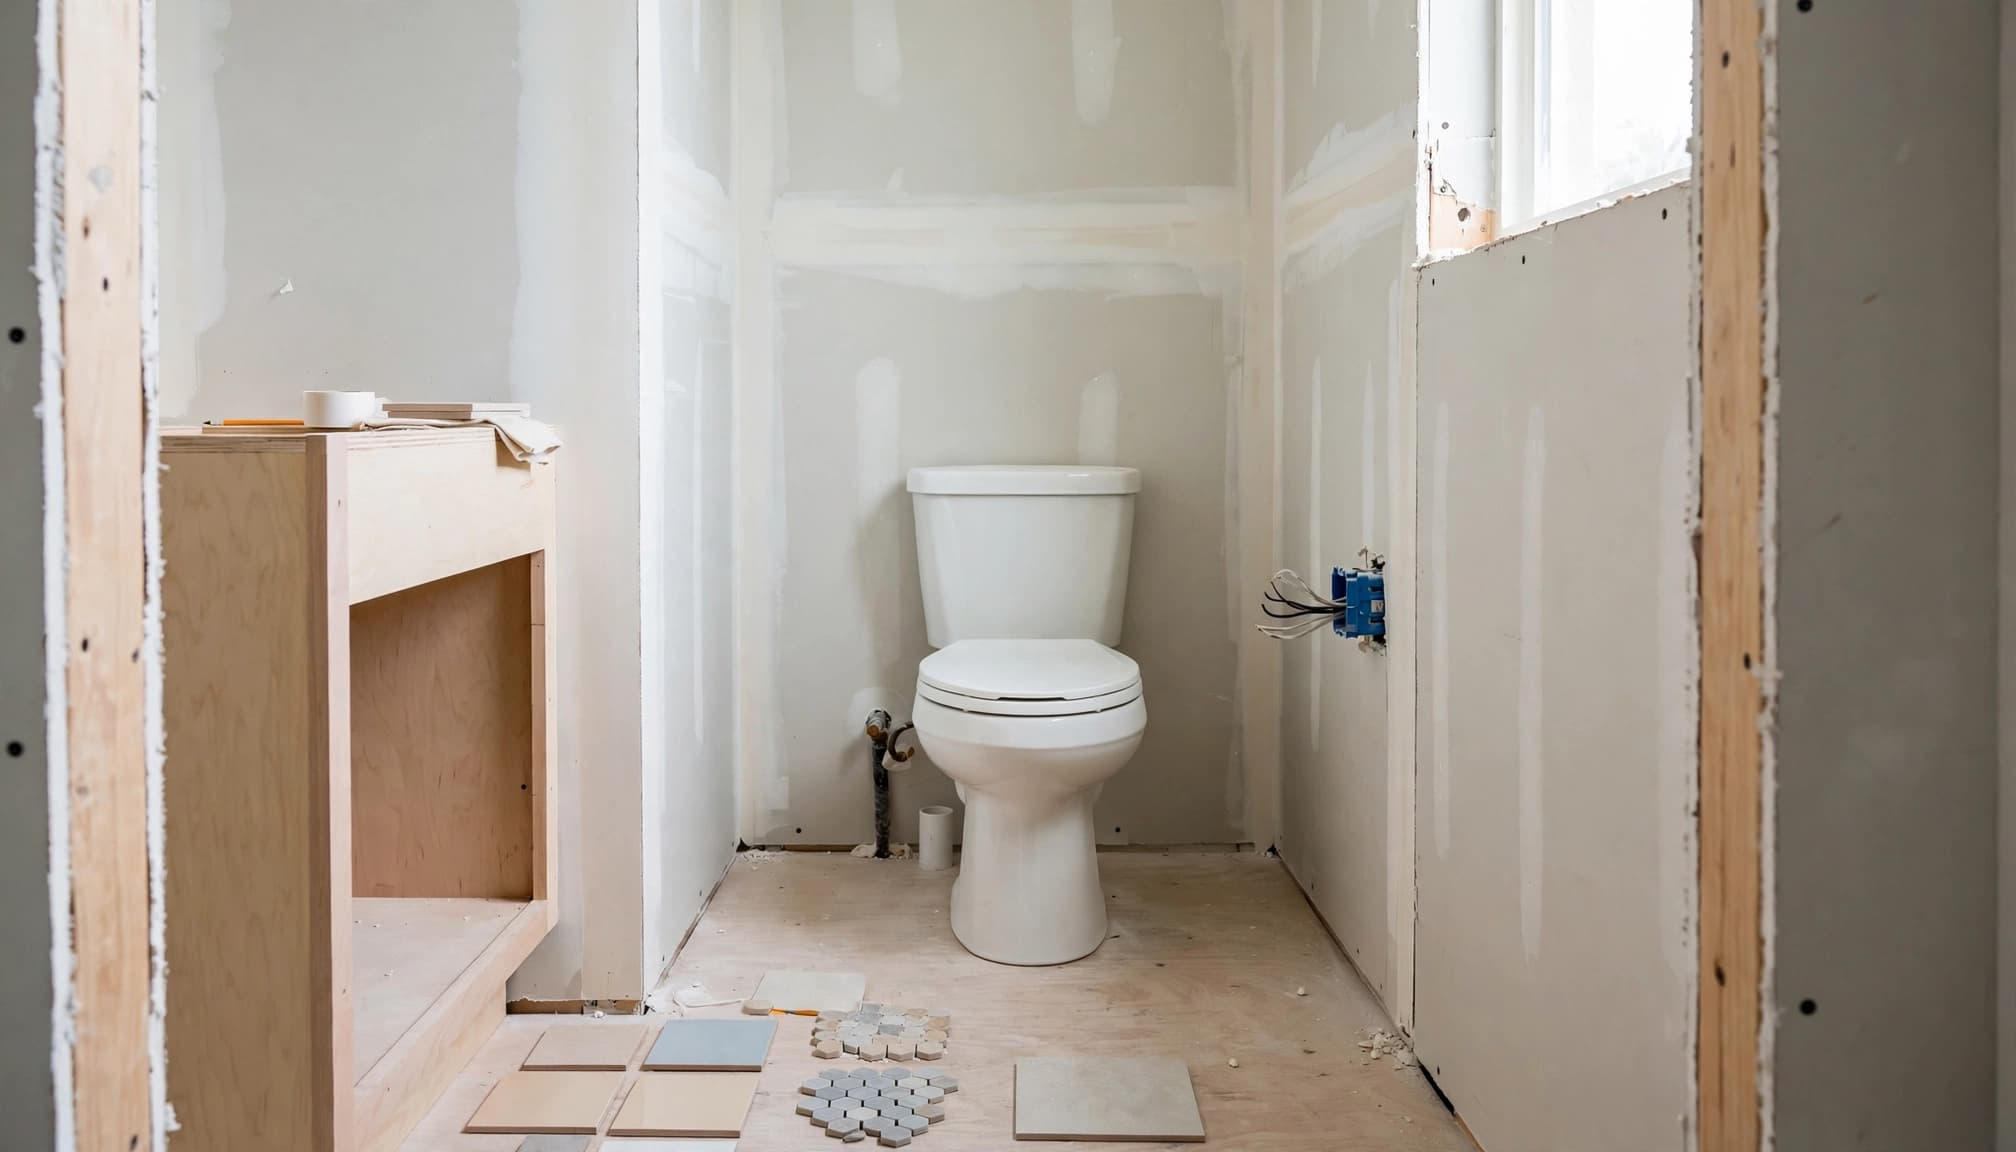
During rough-in, the electrician can route wiring and set the box before the wall receives its final surface. The outlet can then be positioned in relation to the toilet and the device's cord, rather than placed wherever it happens to fit after construction.
Finishing work adds constraints. Tile edges, grout lines, trim, waterproofing details, and vanity dimensions can all affect the usable space around an outlet. Planning early reduces the chance that the receptacle ends up hidden, blocked, or visually awkward.
Treat the outlet as part of the fixture plan
The bidet device isn't an afterthought like a towel hook. It has electrical and, in some models, plumbing needs that influence the bathroom layout. Include it alongside the toilet, faucet, lighting, and other fixtures when developing the remodel plan.
For a broader look at room layout and project scope, see our primary bathroom remodel planning guide.
Choose the bidet device before electrical rough-in
"Bidet outlet" doesn't describe one standard setup. A bidet seat attached to a conventional toilet may differ from a one-piece bidet toilet in power use, cord position, and plumbing connections. Product manuals are the starting point for the electrical plan.
For example, TOTO's WASHLET C100 manual specifies 120 volts, 60 Hz, a grounded 15-amp outlet, GFCI protection, and a separate circuit with no other appliance sharing it. It also gives a cord length of about 3 feet and specifies that the GFCI outlet be within 2 feet of the operation panel. Those are C100 instructions, not universal rules for bidet seats.
| Example device | Product-specific electrical details |
|---|---|
| TOTO WASHLET C100 | 120 V, 60 Hz; grounded 15 A outlet; GFCI protection; separate circuit; approximately 3-foot cord |
| TOTO WASHLET E200 | 120 V, 60 Hz; 410 W; approximately 3-foot cord |
| TOTO SW2033/SW2034 | 120 V, 60 Hz; 406 W; right-side cord up to 3.94 feet |
The table shows why a model matters. Follow the chosen device's manual, then have a licensed electrician determine how those instructions apply to the planned installation.
Check the cord exit and reach
The cord's side and length can shape which wall location makes sense. TOTO's SW2033/SW2034 specification sheet, for example, lists a right-side cord and gives a model-specific outlet callout. Another product may place the cord differently.
Before rough-in, identify the device model and its operation panel location. The cord should reach the outlet without tension, awkward looping, or interference with the toilet or seat. Also consider whether the receptacle will remain accessible for service and removal.
Consider plumbing needs separately
A bidet seat usually attaches to a toilet, while an integrated bidet toilet may have different water-supply requirements. Read the product instructions to understand what the selected device needs. Don't assume the existing toilet supply, shutoff location, or nearby clearance will work without review.
The electrical plan and plumbing plan should be coordinated together. Our bathroom renovation selections checklist can help organize fixture and finish decisions before rough-in begins.
Position the outlet with the toilet and vanity
A practical outlet location starts with the installed toilet, not only the rough plumbing stub-out. Account for the finished wall surface, toilet dimensions, bidet controls, cord path, and the space needed to clean around the fixture.
As a general planning approach, keep the receptacle close enough for the manufacturer's cord to reach and place it where the seat or toilet won't block access. Avoid a spot where the cord must cross a walkway or press against a hot, sharp, or moving surface. The electrician should determine the permitted placement for the actual bathroom conditions.
Keep clear of the vanity and plumbing
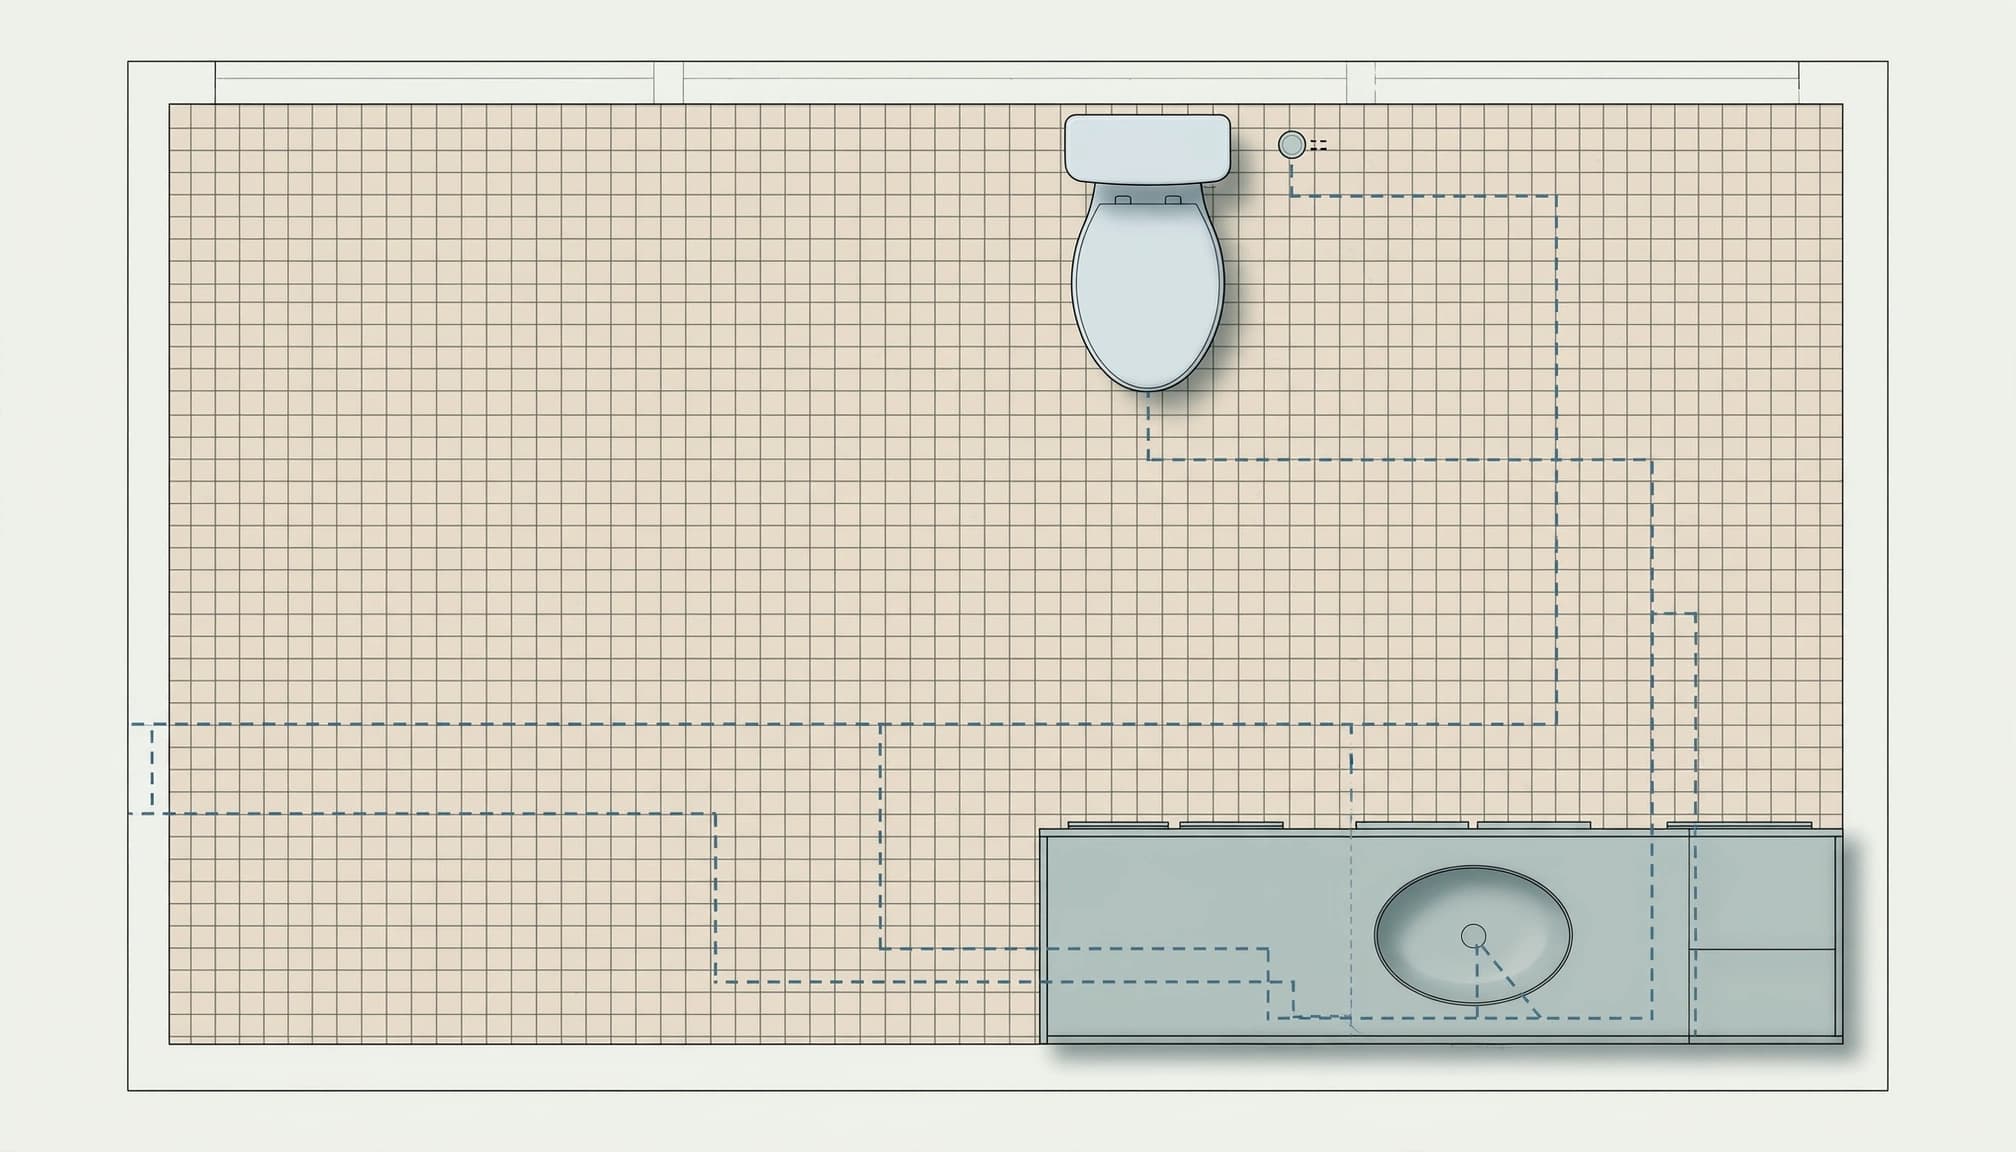
The vanity can limit access to an outlet placed too close to the toilet. Check drawer and cabinet swings, countertop overhangs, and the location of the sink plumbing. Similarly, the toilet's water supply and shutoff should remain usable after the bidet device is installed.
A layout drawing helps the electrician and plumber see the same finished conditions. Mark the toilet centerline, vanity edges, water supply, and proposed outlet, then compare those locations with the product's installation diagram. For help coordinating fixture and pipe locations, see our bathroom plumbing rough-in checklist.
Preserve access for daily use and service
A receptacle shouldn't be so tucked behind the toilet that it's difficult to reach, but a convenient position still has to meet electrical requirements. Consider access for unplugging the device, cleaning the area, and removing the seat or toilet for service.
Avoid choosing a position based only on appearance. A hidden outlet may look tidy but can be impractical if the cord is strained or the plug is inaccessible. The electrician can balance reach, protection, access, and code requirements for the specific installation.
Coordinate the outlet with tile and waterproofing
Tile layout is part of the outlet plan because the finished wall changes the outlet's relationship to the toilet and vanity. Tile thickness, backer material, and trim can affect the final position of the receptacle cover. A planned tile grid can also help avoid an outlet landing awkwardly against a narrow cut or decorative band.
Make electrical decisions before setting tile, and coordinate them with wall preparation and waterproofing. The outlet location should not compromise a shower membrane or other waterproofing detail. In wet areas, the product, wall assembly, and applicable electrical rules matter.
Set the tile layout around finished fixtures
Confirm the toilet's intended location and the vanity dimensions before laying out tile. If tile continues behind or alongside the toilet, include the finished surface thickness when determining the outlet box position. The finished receptacle should sit correctly against the wall surface, not recessed or projecting because the tile assembly was overlooked.
These details are easier to resolve on the plan than during finish work. Our guide to bathroom waterproofing steps before tile installation covers related coordination before the walls are closed.
Keep tile work and electrical work in sequence
The electrician should complete the required wiring and box work at the appropriate construction stage. Any required inspection should take place before the work is concealed. Tile installation follows after the underlying assemblies are ready and approved where applicable.
The sequence depends on the project scope and permit requirements. Don't treat tile installation as a deadline for solving an outlet location that hasn't been discussed. Resolve the device, wall, plumbing, and electrical details first.
Understand permitting and electrical safety in Cape Coral
Cape Coral's permitting guidance states that electrical wiring work requires a permit unless it qualifies for an exemption, and work cannot begin without a required permit or approved exemption. A bidet outlet added during a remodel may involve electrical work that needs review. The full bathroom scope can also affect which permits apply.
The City of Cape Coral Building Division administers local permitting, while the Florida Building Code and adopted electrical provisions govern applicable work. Requirements can depend on the property, the work, and the current rules. A licensed electrician should confirm current local permitting requirements and the device specifications before work begins.
GFCI and circuit rules aren't one-size-fits-all
Bathroom receptacles have electrical safety requirements, including GFCI protection in applicable situations. However, the exact circuit and outlet details for a bidet depend on the adopted code, installation conditions, and manufacturer instructions.
Some manufacturers specify a separate circuit for a particular model. TOTO's C100 manual does; Bio Bidet manuals for the BB-500 and BB-550 call for GFCI protection and a dedicated 120-volt outlet, while describing a separate circuit as recommended. Those instructions don't create one universal circuit rule for every device.
Keep general guidance separate from code requirements
General planning advice can help you choose a sensible location, but it doesn't replace code or manufacturer requirements. There is no universal outlet side, height, or placement that applies to every bidet. Likewise, a model-specific instruction shouldn't be presented as a rule for another product.
Electrical work should be handled by a licensed electrician. The electrician can review the current requirements, the device manual, and the bathroom conditions, then coordinate any permit and inspection steps with the remodel scope.
Put the outlet decision into the remodel schedule
A bidet outlet is easiest to coordinate when the project team knows about it before rough-in. Add the device to the fixture selections and project scope, then share the installation instructions with the electrician. The toilet, vanity, water supply, tile, and receptacle should appear in one coordinated plan.
This also helps prevent a late change from being treated as an unplanned extra. A clear scope identifies which electrical work is included and who is coordinating required permits and inspections. Our remodel contract checklist covers documentation that can clarify work responsibilities.
Before rough-in, settle the key details
Choose the device model and save its manual. Confirm whether it is a bidet seat or integrated toilet, note the cord exit and power requirements, and review any plumbing changes. Then show the proposed location relative to the toilet, vanity, and finished wall.
At this stage, the electrician can determine the wiring and box requirements. If the remodel includes other electrical changes, consider them together so the installation is planned as part of the full project rather than handled as a last-minute addition.
Before tile, review the installed conditions
Once rough-in work is complete, compare the outlet location with the final toilet position, vanity plan, tile layout, and product instructions. Keep required work accessible until inspections are complete. Resolve any conflict before tile or other finishes make changes more disruptive.
This review is especially useful when the toilet or vanity shifts from its original location during design. A small layout change can affect whether the cord reaches or whether the receptacle remains accessible.
FAQ: Bidet outlets in a bathroom remodel
Should the outlet go on the left or right side of the toilet?
There isn't one side that works for every model. Check the device's cord exit and manual, then coordinate that information with the toilet position and bathroom layout. The electrician should confirm a suitable location under applicable requirements.
Does every bidet need a dedicated circuit?
No universal answer applies. Some product manuals specify a separate circuit, while others describe it as recommended. Have a licensed electrician review the instructions for your chosen model and the existing electrical system.
Can the outlet be installed after tile?
It may be possible, but adding or moving wiring after tile can require cutting and repairing finished surfaces. Planning the outlet before tile installation usually gives the project more flexibility and reduces the chance of disrupting new finishes.
Can I use the outlet behind the toilet tank?
That depends on the device's cord reach, access needs, toilet design, and electrical requirements. A position hidden by the tank may make plugging in or servicing the bidet difficult. Review the finished layout with the electrician before selecting the location.
Make the outlet part of the early plan
A bidet outlet is a small detail with several dependencies. Choose the device early, coordinate its power and cord requirements with the toilet and vanity, and place the electrical work in the schedule before tile installation.
For your Cape Coral bathroom remodel, have a licensed electrician review the product instructions and current local permitting requirements before work begins. That gives the project a clear plan before the finished surfaces are in place.