

Bathroom Waterproofing Cape Coral: Steps Before Tile
A bathroom waterproofing Cape Coral project can fail before the first tile is set. Moisture can move behind grout, through wall joints, and beneath a shower floor when the substrate or membrane has been prepared incorrectly.
The safest approach is to follow one compatible waterproofing system from start to finish. Before tile installation, the surface must be sound, seams must be sealed, corners must be treated, cure times must be met, and the shower pan must pass a flood test. Start with the structure beneath the tile, not the tile itself.
Bathroom Waterproofing Cape Coral: Inspect the Room Before Work Begins
Waterproofing starts with an inspection, not a paint roller. Remove loose tile, damaged drywall, old caulk, and any material that has absorbed water. A contractor should check the framing, subfloor, plumbing penetrations, and areas around the shower valve and drain.
Look for signs of past moisture damage, including:
- Soft or swollen wall materials near the tub or shower.
- Dark staining around corners, plumbing openings, or the shower curb.
- Cracked subfloor sections or movement underfoot.
- Mold-like odors or visible organic growth.
- Plumbing leaks that could be mistaken for waterproofing failures.
Repair the source of moisture before covering the area. A waterproof membrane won't solve a leaking supply line or a drain connection that moves when the shower is used.
The framing must also provide a flat, stable surface. Shim or plane studs where needed so the backer board sits in one plane. A bowed wall can make tile installation difficult and can place stress on seams, corners, and large-format tile.
On the floor, remove debris and confirm that the substrate can support the selected tile assembly. Shower floors need the correct slope toward the drain. A flat or reverse-sloped floor can leave standing water, even when the membrane itself is intact.
Homeowners can inspect visible damage and discuss layout decisions. However, plumbing changes, structural repairs, electrical work, and serious water damage should go to licensed professionals. In Cape Coral, a full bathroom remodeling project may also involve permit or inspection requirements, so confirm the local rules before work begins.
Choose One Waterproofing System and Follow Its Instructions
A reliable bathroom waterproofing system includes more than a waterproof coating. It includes the membrane, seams, corners, fasteners, drain connection, sealants, and compatible setting materials. Each component must work with the others.
Common shower waterproofing approaches include sheet membranes, liquid-applied membranes, and traditional shower pan liners. Sheet membranes arrive in rolls and use sealed overlaps or proprietary banding. Liquid membranes are brushed or rolled onto the substrate at a specified thickness. Traditional liners sit beneath the mortar bed and require carefully formed corners, clamping drain parts, and properly sealed penetrations.
Each method can work when installed correctly. Problems often occur when installers combine products from different systems without confirming compatibility. For example, a sealant that works with one membrane may soften, fail to bond, or void the manufacturer's instructions on another.
Read the product data before installation. Check the required:
- Substrate type and preparation.
- Primer, mortar, adhesive, or sealant.
- Wet-film thickness for liquid membranes.
- Overlap dimensions for sheet membranes.
- Temperature and humidity limits.
- Minimum cure time before water exposure or tile work.
- Flood-testing requirements.
Cement backer board is stable and tile-friendly, but it isn't waterproof by itself. Water can pass through it, so the board still needs a complete membrane system or another approved moisture-management method.
Do not mix a liquid membrane from one manufacturer with a sheet membrane's banding or drain components unless the product instructions allow that combination. The same rule applies to thin-set mortar, primers, sealants, and waterproofing collars.
A waterproof surface can still leak at a drain, corner, fastener, or pipe opening. Those transitions deserve as much attention as the broad wall areas.
The selected system should also fit the shower design. A curbless shower needs careful detailing at the entry and a properly recessed or built-up floor assembly. Niches, benches, half walls, and shower curbs each create additional inside and outside corners. Plan those details before the membrane goes on.
Prepare the Backer Board, Corners, and Penetrations
Once the substrate is sound, install the approved backer board or mortar bed according to the system instructions. Keep panels properly aligned, and use the fasteners specified for that board and waterproofing assembly.
Avoid placing unnecessary fasteners in the shower floor or curb. Every penetration creates a possible path for water. If the system requires fasteners within a certain area, seal them with the approved material. Never rely on ordinary drywall mud or general-purpose caulk inside a wet area.
Treat every change in plane. That includes wall-to-wall corners, wall-to-floor joints, curb corners, niche corners, and transitions around benches. Waterproofing manufacturers typically provide preformed corners, reinforcing fabric, or seam bands for these locations.
Plumbing penetrations need special care. Seal around the shower valve, tub spout, shower arm, and supply lines with components approved for the membrane. The valve opening should allow the trim's sealing surface to work as designed. Don't bury a rough opening under waterproofing without checking the trim and system requirements.
A shower niche needs a slight slope on its bottom shelf so water drains toward the shower. The same principle applies to benches and horizontal ledges. The waterproofing must cover the entire niche, including its corners and outside edges.
For a shower pan, confirm that the drain assembly matches the chosen membrane. A bonded waterproofing flange must bond to the membrane. A traditional liner must connect to the clamping drain correctly. These are different assemblies, and one cannot be substituted for the other without following the manufacturer's details.
Apply the Membrane Without Missing Weak Spots
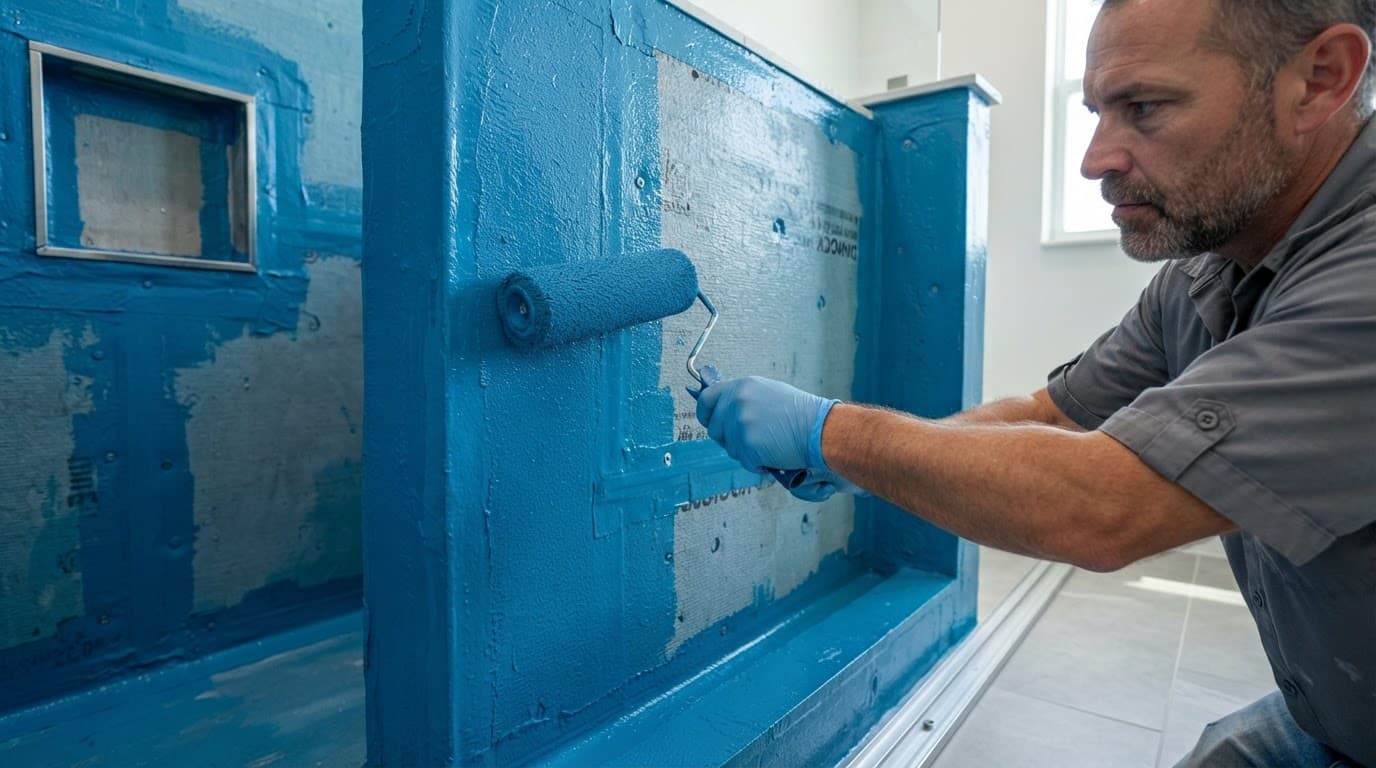
Before applying a liquid membrane, remove dust and confirm that the surface meets the product's moisture and smoothness requirements. Some systems require primer. Others require dampening or a particular backer board. Use the written instructions for the product installed, not a general online shortcut.
Brush liquid membrane into corners, seams, and around penetrations first. Install the specified reinforcing fabric or band while the coating is wet. Then cover the field areas with the recommended roller, brush, or trowel.
Thickness matters. A coating that looks covered may still be too thin to meet the system's requirements. Installers often use a wet-film thickness gauge to check the application. Apply additional coats only after the previous coat has reached the required condition.
Sheet membranes need clean cuts, accurate overlaps, and firm bonding. Press out air pockets and wrinkles. Seal seams with the approved band or overlap method. At corners, use preformed pieces when available because they reduce the number of cuts and folds.
The membrane should extend beyond the shower's direct spray area where the system requires it. Cover the shower floor, walls, curb, niche, bench, and other wet-area surfaces as one connected assembly. A waterproofed shower wall beside an untreated curb is still an incomplete system.
Keep the work area clean while the membrane cures. Dust, foot traffic, sharp tools, and later plumbing work can damage the surface. If another trade punctures the membrane, repair the damage with the manufacturer's approved patch detail before proceeding.
Never rush tile installation because the surface looks dry. Some liquid products dry by color change, but that doesn't always mean they have reached the required cure. Temperature, humidity, coat thickness, and ventilation affect drying. Follow the product's stated waiting period.
Flood Test the Shower Pan Before Tile Installation
A flood test checks the shower pan before tile hides the waterproofing. It is one of the most important bathroom waterproofing Cape Coral steps because repairs are far easier before mortar and tile cover the assembly.
First, seal the drain with the plug or test device required for the drain design. Fill the pan to the permitted test level, usually below the top of the curb or entry. Mark the water level, record the start time, and inspect the area below and around the shower for leaks.
The test duration depends on the applicable code, project requirements, and waterproofing system. Follow those requirements rather than guessing. Some systems also require the membrane to cure for a stated period before testing.
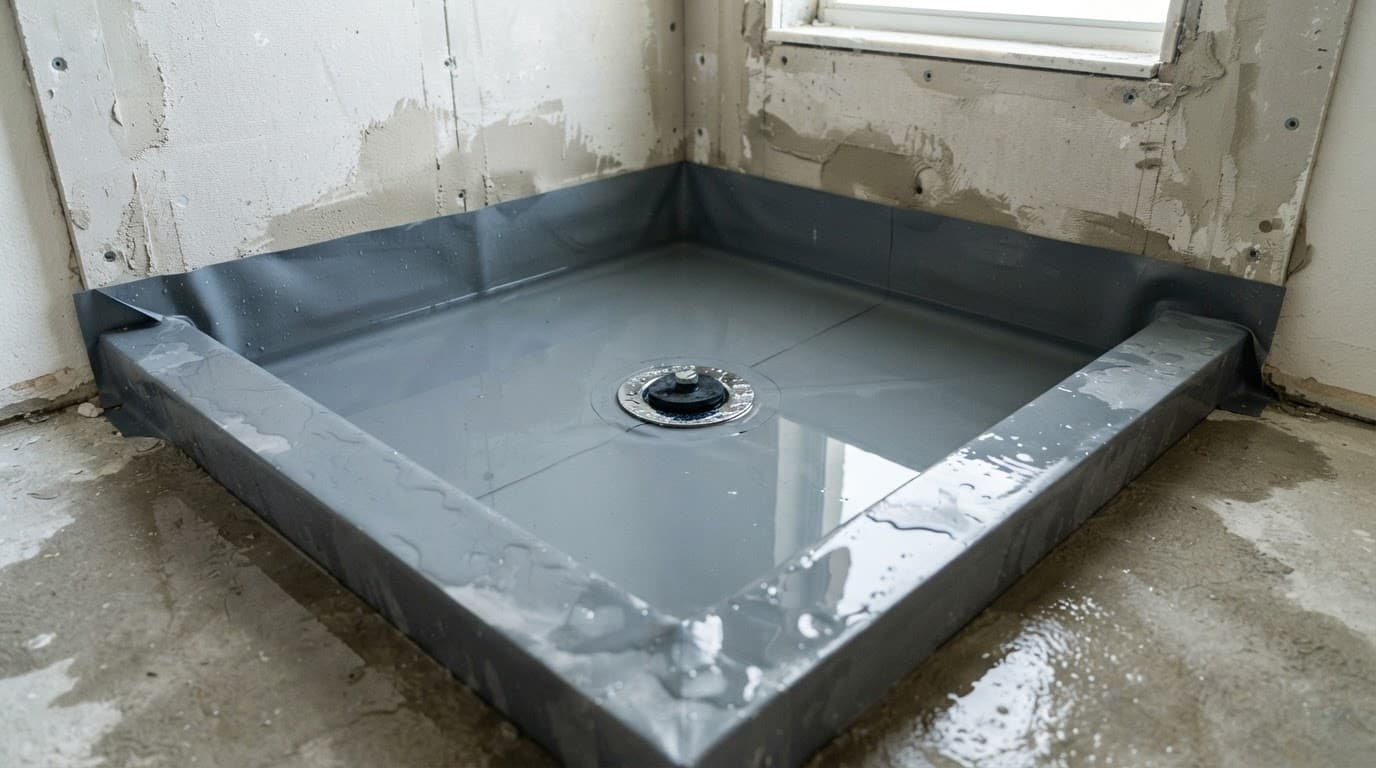
If the water level drops, first check for evaporation, a loose test plug, or water displacement. A significant unexplained loss requires investigation. Do not tile over the shower until the leak source is found and repaired, then repeat the test.
A flood test is best handled by the installer or waterproofing professional because the correct test method depends on the drain and membrane assembly. The installer should document the test and confirm that the pan passed before tile work begins.
Flood testing doesn't replace a visual inspection. Review the entire waterproofing assembly after the test. Check the curb, corners, seams, niche, bench, valve opening, and drain connection for damage or incomplete coverage.
Pre-Tile Waterproofing Checklist
Use this concise review before bringing tile into the shower:
- The plumbing and framing are complete, sound, and free of active leaks.
- The backer board or mortar bed matches the waterproofing system.
- The shower floor slopes toward the drain.
- The membrane covers the floor, walls, curb, niche, bench, and transitions.
- Seams, corners, fasteners, and penetrations use approved components.
- The drain and membrane connection match the selected system.
- Liquid membrane thickness or sheet membrane overlaps meet the product instructions.
- All materials are compatible, and no unapproved sealants or mortars were added.
- Required cure times have passed.
- The shower pan has passed its flood test.
- The completed work has been photographed or documented before tile covers it.
Tile should go down only after every item is resolved. If a contractor wants to skip the flood test or cannot identify the waterproofing system, pause the installation and ask for clarification.
Conclusion
A durable shower begins with a continuous waterproofing assembly beneath the tile. In a bathroom waterproofing Cape Coral project, careful substrate preparation, compatible materials, sealed transitions, proper cure times, and a documented flood test matter more than the tile pattern.
Homeowners can ask which system the installer selected, request the manufacturer's installation details, and confirm that the shower passed testing before tile begins. Once the membrane is covered, a small missed seam can become a much larger repair. Proper waterproofing keeps that problem from starting.