

Kitchen Cabinet Crown Molding for Uneven Ceilings
Kitchen cabinet crown molding can fit an uneven ceiling without making your cabinets look crooked. The usual solution is to keep the cabinets level and adjust the trim above them, often with a scribed filler or a layered molding design.
In a Fort Myers home, the right approach depends on how the ceiling varies and how much room you have above the doors. A careful fit matters more than choosing a wide molding and hoping it hides the problem. Start by looking at the ceiling and cabinets as separate parts of the installation.
Why a level cabinet can show an uneven ceiling
Cabinets need a consistent line so doors align and operate properly. Ceilings, however, don't always follow that same line. Drywall can have shallow waves, and a ceiling may rise or fall gradually across a cabinet run.
When a straight piece of molding meets that surface, the gap above it can change along its length. If the installer follows the ceiling with the entire crown, the molding may appear tilted against the cabinet doors.
Start with the cabinet line
Before planning trim, the cabinets need to be secure and properly aligned. Door clearance also matters: crown molding or its support should not prevent doors from opening fully.
For existing cabinets, loose boxes, rubbing doors, or uneven fronts deserve attention before decorative work begins. Adding molding won't correct an underlying cabinet problem.
Look for the shape of the ceiling
A gradual slope calls for a different treatment than a dip in the middle of a run. So does a localized ceiling bump that interferes with an otherwise straight molding.
The installer can use a level reference to see where the ceiling sits high and low. That map helps determine where a filler needs extra width and whether a ceiling repair would be a better starting point.
Choose a solution for the ceiling variation
There isn't one molding profile that fits every uneven ceiling. Your choice should account for the shape of the gap , the cabinet style, and the amount of space between the cabinet tops and ceiling.
For gentle slopes or shallow waves
A scribed filler above the crown can follow the ceiling while the decorative molding stays level. This is often a good choice when the variation is visible but the filler still looks balanced across the run.
For a long, gradual slope, the filler will change width gradually. A shallow dip may create a wider section near the middle. Looking at the whole run helps you decide whether that changing width will be acceptable.
For pronounced changes or tight spaces
Layered trim can provide more flexibility when a single narrow piece won't cover the transition attractively. If the ceiling has a sharp bump or a damaged section, repairing that area before fitting the trim may produce a cleaner result.
When there's too little room above the cabinet doors, a full crown assembly may not fit without blocking them. A shorter profile, a different cabinet height, or a deliberate open space above the cabinets may work better. The goal is a design that looks intentional throughout the kitchen, including at corners and exposed cabinet ends.
Scribing crown molding to an uneven ceiling
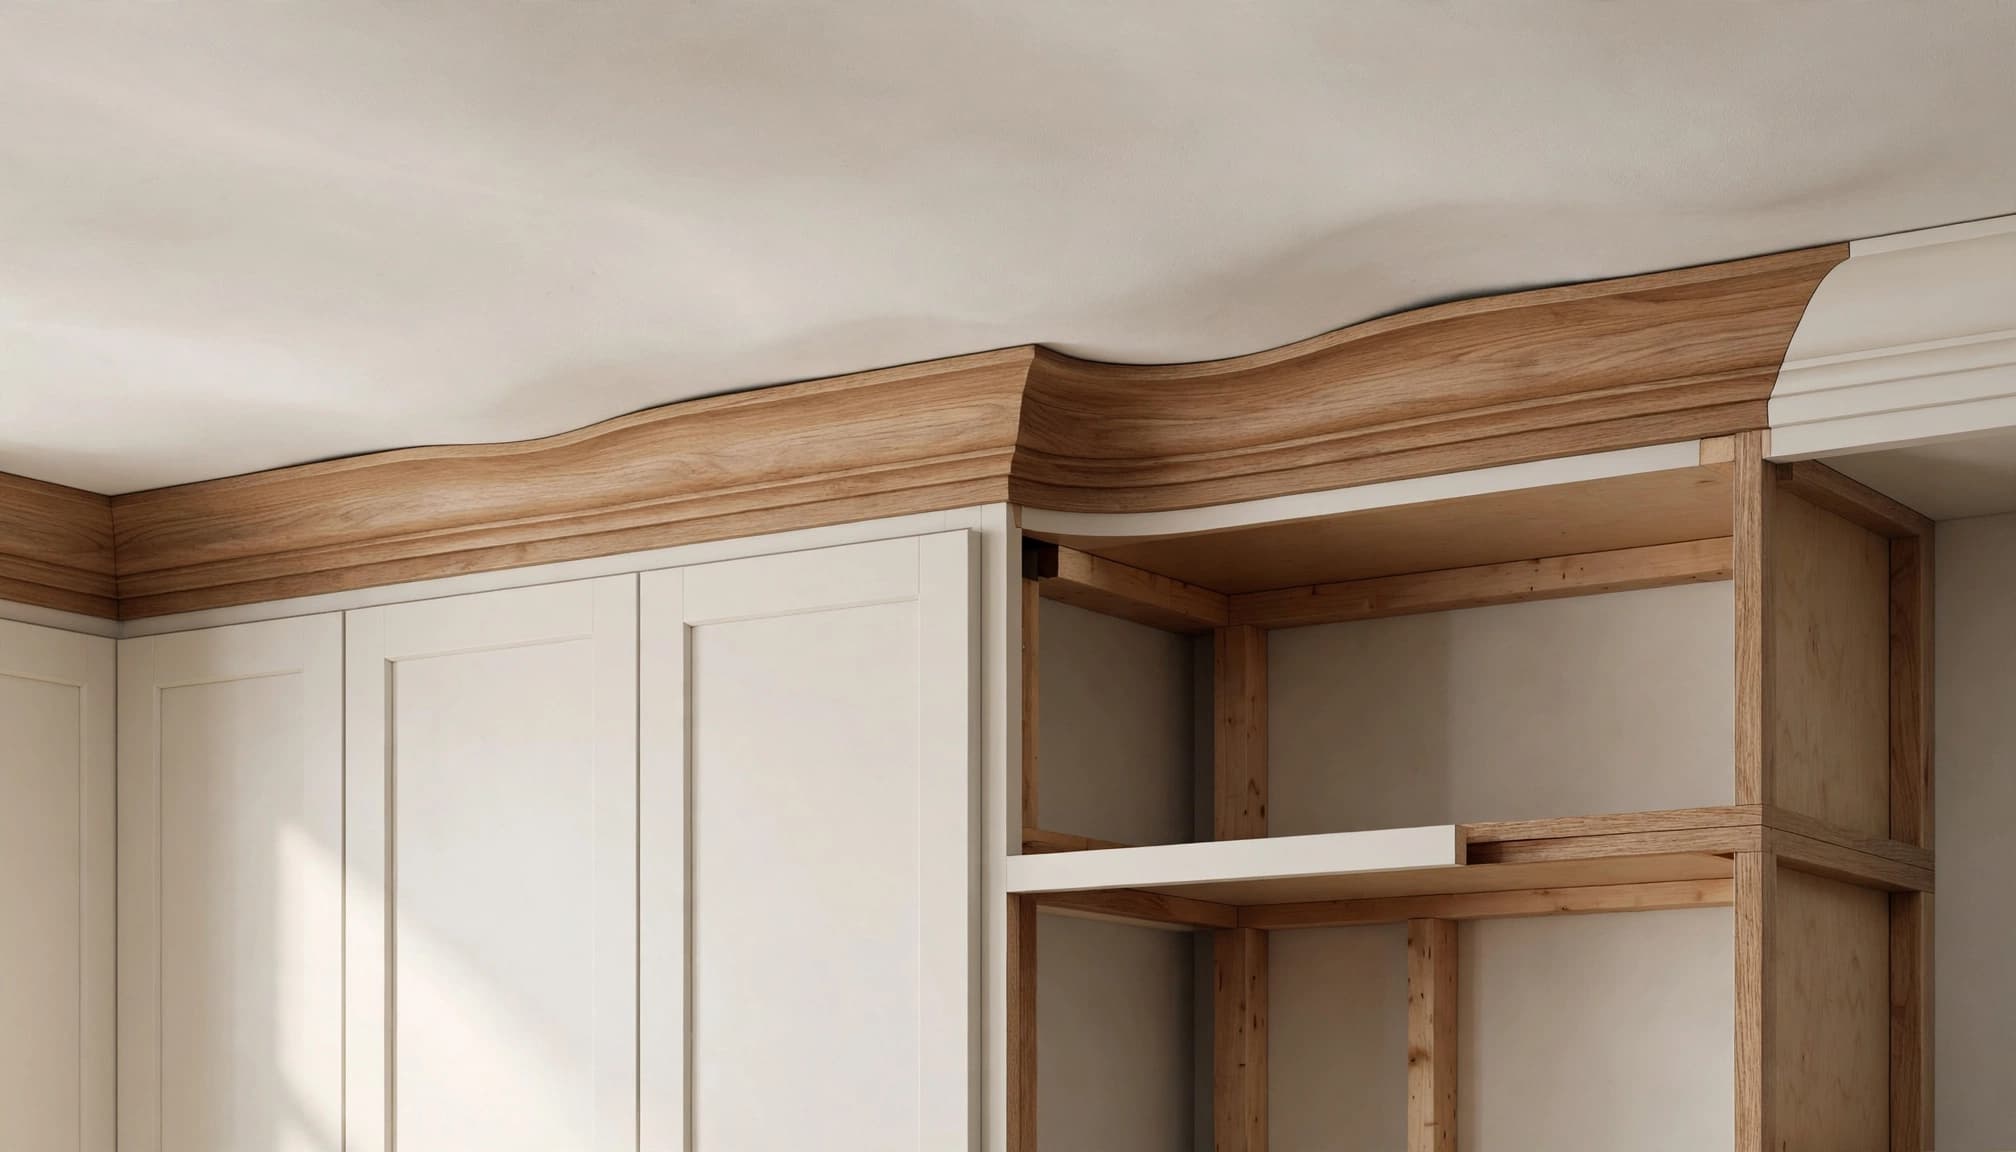
Scribing transfers the ceiling's irregular shape to a trim piece. The installer then trims that edge so it follows the ceiling while the lower edge stays aligned with the cabinet.
How the fit comes together
A common approach uses a flat filler or riser above the cabinets, with the crown installed below or against it. The installer positions the filler, traces the ceiling variation onto its upper edge, and trims it to fit.
The piece may need several test fits before attachment. Once the filler follows the ceiling, the decorative crown can maintain a consistent line along the cabinets. This approach preserves the shape of the crown rather than cutting away a prominent part of its profile.
What you'll see after installation
The filler may be wider at one end or through a dip in the ceiling. That variation is usually less noticeable than a widening open gap, especially when the filler and cabinets share a finish.
Scribing has limits, though. A sharply uneven ceiling can make the filler look visibly tapered. In that case, a layered design or ceiling repair may create a better result. The installer should also plan how the scribed piece ends at walls and cabinet returns, where an uneven edge can become more noticeable.
Use layered molding for a more forgiving transition
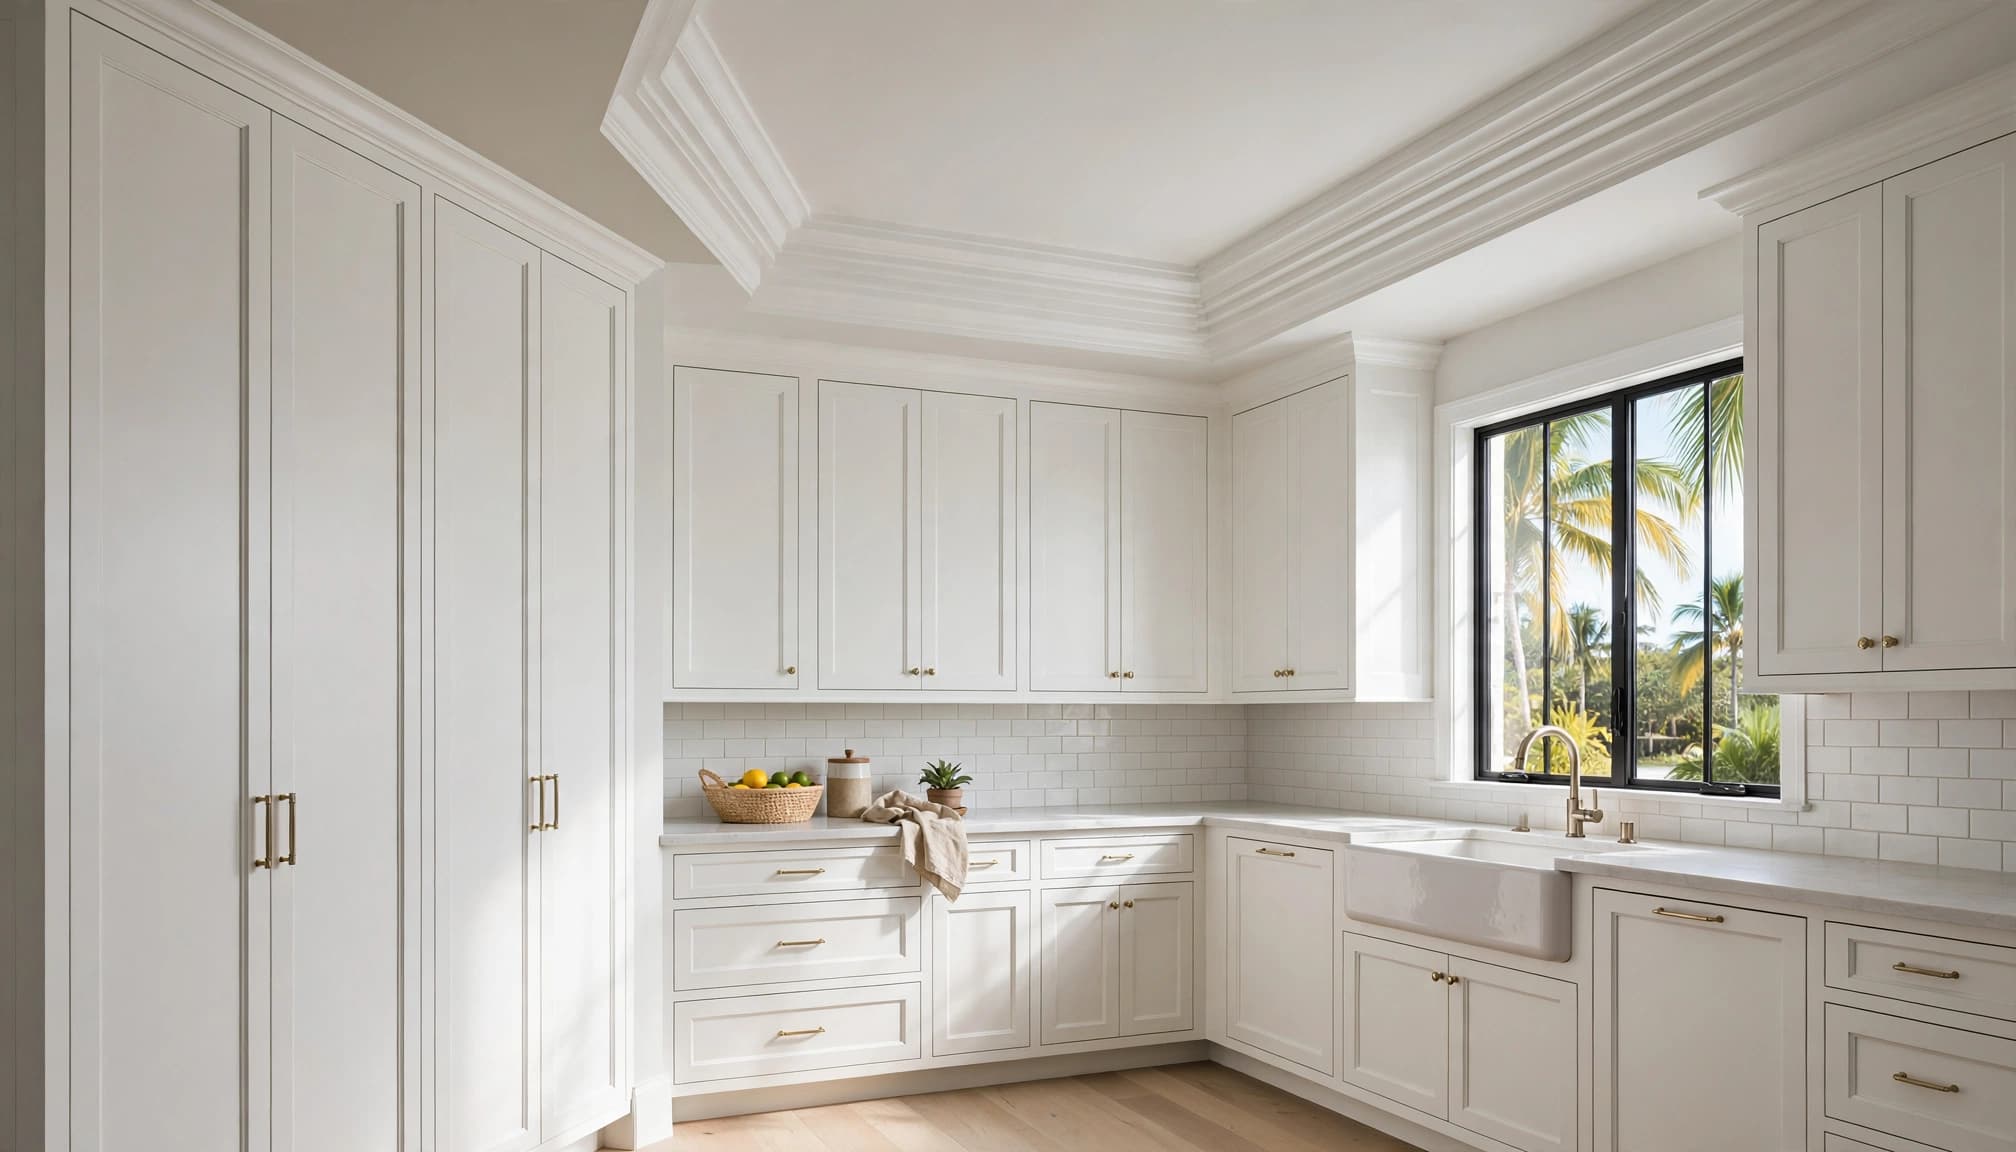
Layered crown molding combines separate trim pieces instead of relying on one profile to cover the full space. A cabinet riser can establish a straight base, the crown adds its decorative shape, and an upper filler can be fitted to the ceiling.
Where a stepped profile helps
A stepped assembly creates a visual break between the level cabinet line and the irregular ceiling. It also gives the installer separate pieces to fit, which can be useful across a long run or around an inside corner.
Layering doesn't make a ceiling level. The uppermost piece still has to meet the ceiling, stop short of it, or sit beneath a repaired surface. The benefit is having more control over where the changing width appears.
Match the profile to the kitchen
A simple cabinet design may look best with a restrained riser and crown. More detailed doors can support a deeper, more traditional profile if the available space allows it.
Look at the molding alongside the hood, pantry cabinets, and any trim that continues around the room. In a low-ceilinged kitchen, an overly heavy assembly can draw attention to the very transition you're trying to soften. A sample held in place can make the proportions easier to judge before the full run goes up.
Manage visible gaps without relying on caulk
A small, consistent seam at the ceiling may need only a neat finish. A gap that changes noticeably across the run needs a fitting strategy first.
Paintable caulk can tidy a narrow joint after the trim is properly fitted. It isn't a substitute for a missing filler or a repair to a damaged ceiling. A thick bead can follow the same uneven line as the gap and become more obvious once the kitchen lights are on.
Close the gap with a fitted piece
A narrow trim piece or scribed filler can bridge a varying space without forcing the crown out of alignment. Where a ceiling has an isolated low spot, localized ceiling work may reduce the amount of adjustment needed in the trim.
If the cabinets end beside a wall, the installer also needs to plan the return. A well-fitted front edge can still look unfinished if the side exposes a large opening.
Leave space on purpose
Crown doesn't have to touch the ceiling. Cabinets can stop below it with a consistent, intentional open space above the molding.
This approach can suit a kitchen where ceiling variation is too pronounced for a pleasing filler. However, the space becomes part of the finished design, so consider how it will look from the entrance and nearby living areas. It will also need occasional cleaning.
What to expect during installation
The work begins with measurements across each cabinet run, including corners and exposed ends. The installer considers the high and low points of the ceiling, the cabinet alignment, and the space available above the doors.
Next comes a layout for the riser, crown, and any filler. Existing trim may need to come down before the new pieces can be fitted. In a remodel, ceiling patching or cabinet adjustments may also need to happen before the decorative work starts.
The trim is typically cut and test-fitted before final attachment. Expect some adjustment at corners: a joint that looks neat on the floor may need refinement once the pieces meet the actual cabinets and walls.
After installation, the finish work can include filling small fastener holes, treating suitable seams, and touching up paint. If the cabinets have a factory finish, matching the molding color and sheen deserves attention. Look at the completed transition in both daylight and kitchen lighting, since shadows can reveal a seam that was hard to see during fitting.
For a larger project, our Cape Coral kitchen remodeling services bring cabinet and finish decisions into the renovation plan rather than leaving the crown until the end.
Fort Myers conditions worth considering
Fort Myers kitchens experience heat and seasonal humidity, while cooking and dishwashing add moisture indoors. Changes in moisture can affect wood components and finished joints, so a tidy installation also depends on a sound, dry room.
Pay attention to ceiling stains, soft areas, or signs of a past leak before covering an irregular edge with trim. A roof leak, plumbing problem, or storm-related water intrusion needs repair at its source. Molding can conceal a mark, but it can't resolve the damage behind it.
Existing cabinets deserve the same attention. Swelling around the sink, dishwasher, or cabinet base can point to water exposure that affects more than appearance. If you're deciding whether to keep the cabinets, our comparison of cabinet refacing and replacement covers the condition and layout questions that matter.
Ventilation and a well-maintained air-conditioning system also help manage indoor moisture. For additional ideas on finishes and layouts suited to the area, see our Fort Myers kitchen remodeling ideas.
Plan crown molding before cabinets are ordered
For new construction or a full kitchen renovation, decide how the cabinets will meet the ceiling during the design stage. Cabinet height, door clearance, the hood location, and the desired trim profile all affect the space available for a finished transition.
That planning is especially useful when you want cabinets to reach the ceiling. A cabinet that fits beneath the lowest spot may leave more room elsewhere, so the crown and filler need to account for the full run. Waiting until the cabinets arrive can limit the available choices.
With existing cabinets, the starting point is different. The installer works with the height and door positions already in place, then selects trim that fits those constraints. If the cabinets are sound but the ceiling is uneven, a new riser and crown may refresh the upper edge without changing the layout.
Ask for the intended look to be shown at an exposed end or corner as well as along the front. Those details make it easier to understand where the trim will return and how the ceiling variation will appear.
A clean finish starts with the right fit
Uneven ceilings don't have to prevent you from adding kitchen cabinet crown molding. Scribing, layered trim, ceiling repair, or an intentional open space can each produce a finished look when matched to the room.
Keep the cabinets level and choose a transition that handles the ceiling's actual shape. A well-planned fit will look more natural than a large gap filled after installation.